I’ve created a noobs guide on how to use BMW Enet E-sys to flash your ECU’s in an F11.
A warm thanks to everybody, especially shawnsheridan.
Disclaimer: All content in this document is to be seen as guidelines. No
one but yourself can take responsibility if you break something as a consequence
of following this guide. The author can in NO WAY be held liable or responsible if
you mess up something / anything.
Remember always to create a backups before starting an endeavour like this!
All this could not have been done without primarily shawnsheridan and a bunch of other users.
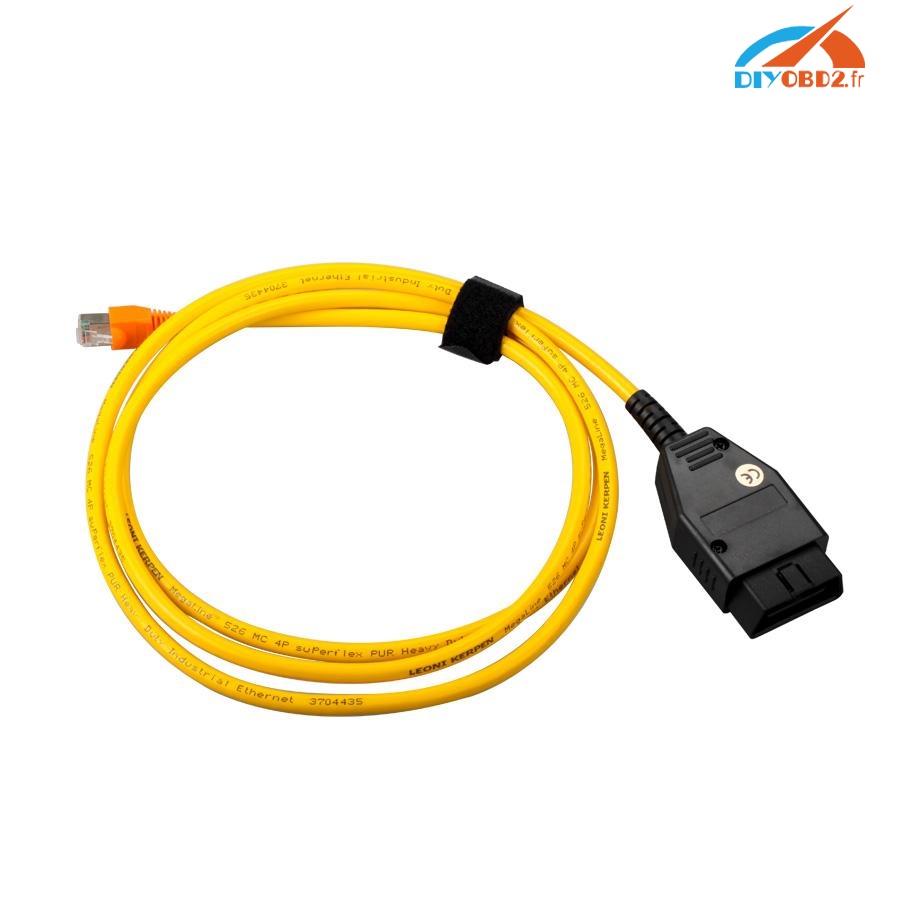
Prerequisites: ENET cable (BMW ICOM better if programming needed), E-Sys & PsdZData files (data 54.0 is used in this guide). It’s important that the
PsdZData files are the FULL version as the Lite version does not include all necessities for flashing. And last
prerequisite: a BMW F10 or F11. I’m doing this on my F11 520d. This guide should work for all Fxx chassis.
E-Sys 3.26.0 is used for screen dumps. Other versions may differ slightly.
In this document, I’ll be upgrading these ECU’s:
- CMB_MEDIA
- HU_CIC
- KOMBI
- ZGW
The steps for upgrading other ECU’s should be the same as doing these four. Just remember to identify the dependencies and select appropriately in step 15 in the below procedure.
When flashing involves ZGW it is widely said that the ZGW module should be updated BEFORE other
modules. The TAL (transaction list) generated by E-Sys should take care of this. But if you want, you could
flash the ZGW all by itself and then restart and do the rest. The steps remain the same.
Flashing all modules at once is also as easy as flashing individual modules. Just select all the modules in step
15 (still blFlash, swDeploy, cdDeploy, and ibaDeploy columns)
HU_CIC Depends (PreRequisites) on: 38 + 14 (BOTH ZGW)
KOMBI Depends on: 38 + 10 + 14 + 53 + 57 (ZGW + HU_CIC + ZGW + CMB_MEDIA + HU_CIC)
CMB_MEDIA Depends on: 57 (HU_CIC)
ZGW does not have dependencies.
How to identify dependencies in E-SYS:
Open TAL IN TAL Editor, and it will show you under ECU (TalLine_ID) if it has any PreRequisite ECU (TalLine_ID’s).
As you can see here, TalLine_ID=13 (Kombi) has a PreRequisite of TalLine_ID=11 (HU_CHAMP):
HU_CIC:

KOMBI:

CMB_MEDIA:

ZGW:

Here are the basic steps:
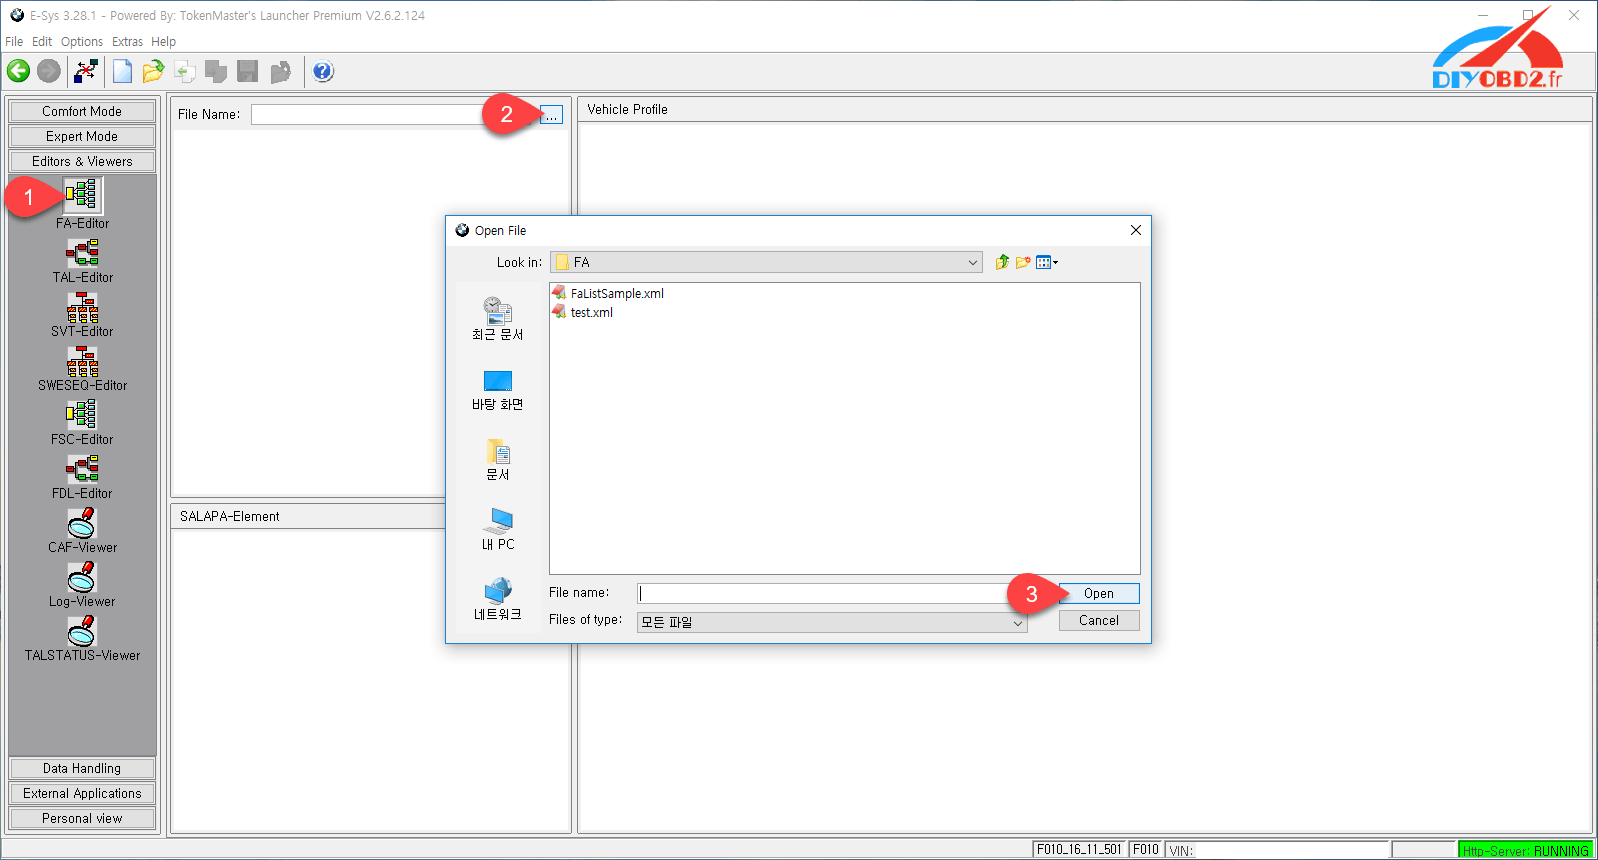
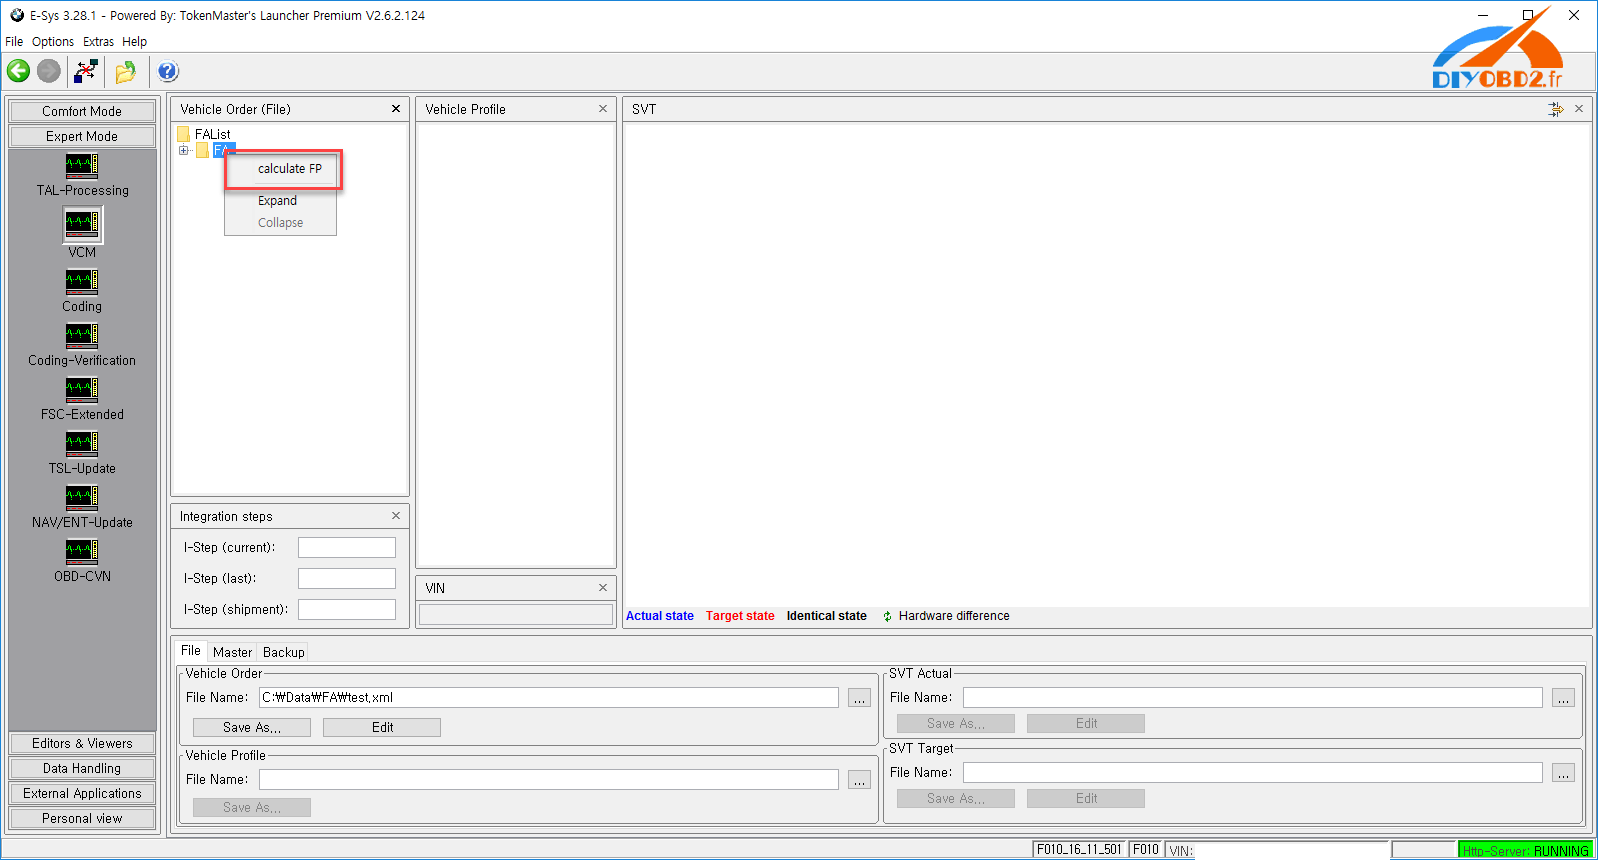
Go to Comfort Mode => TAL-Calculating
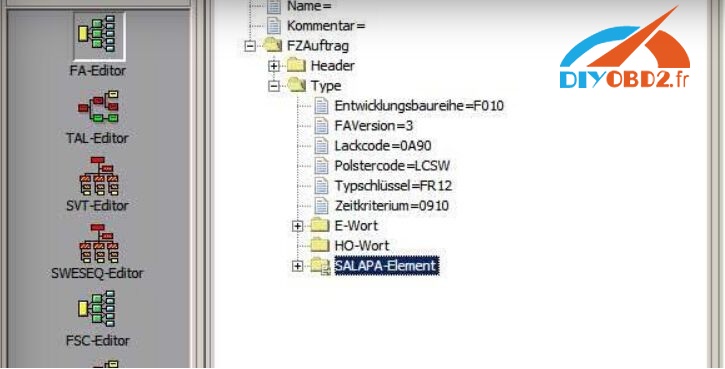
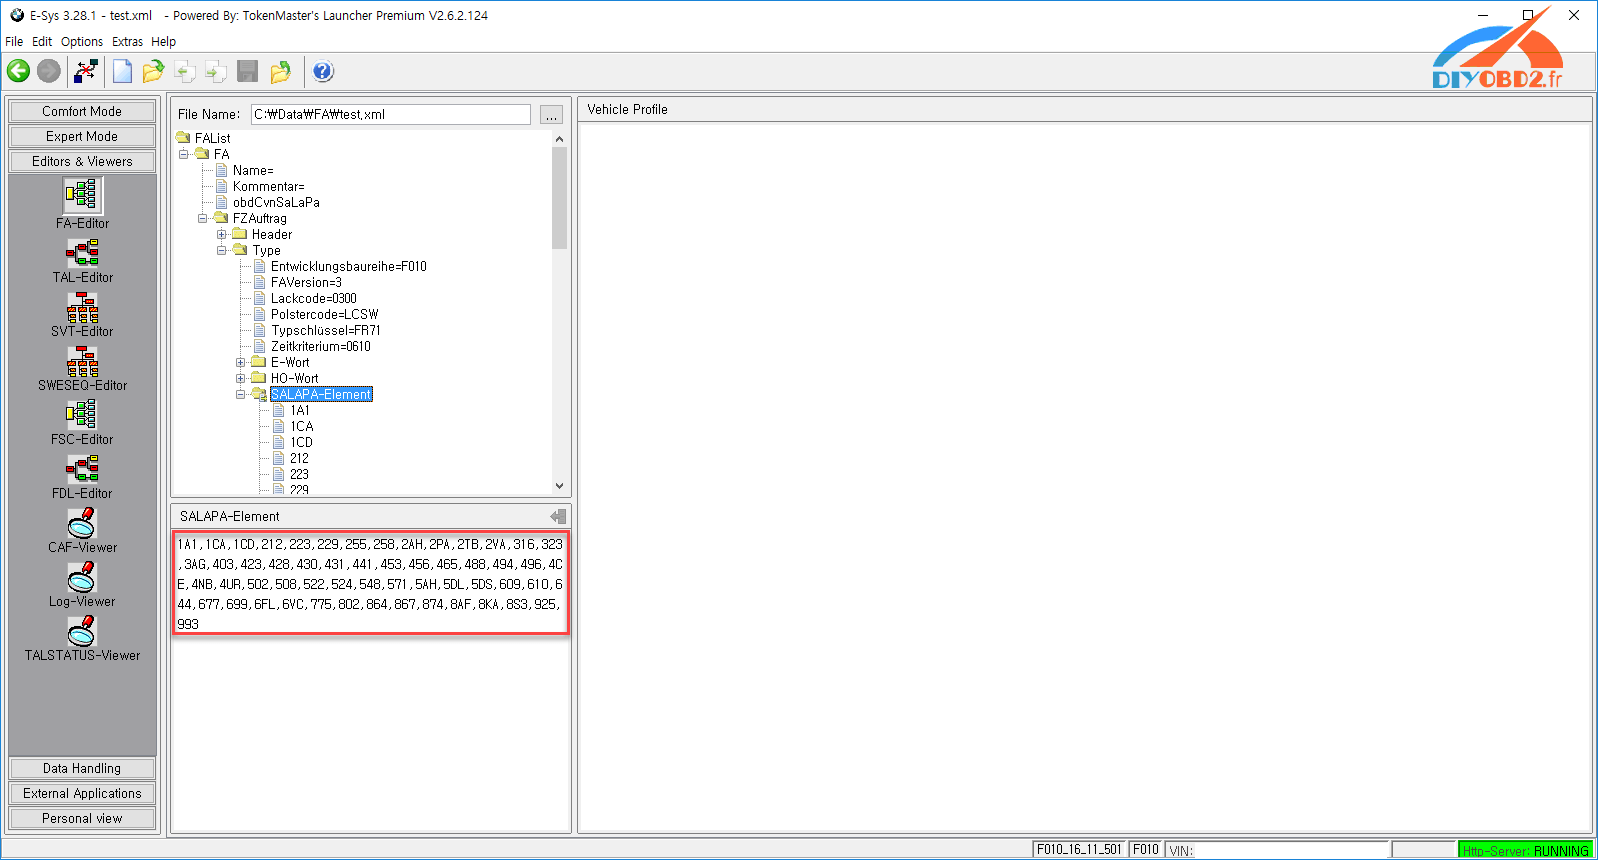
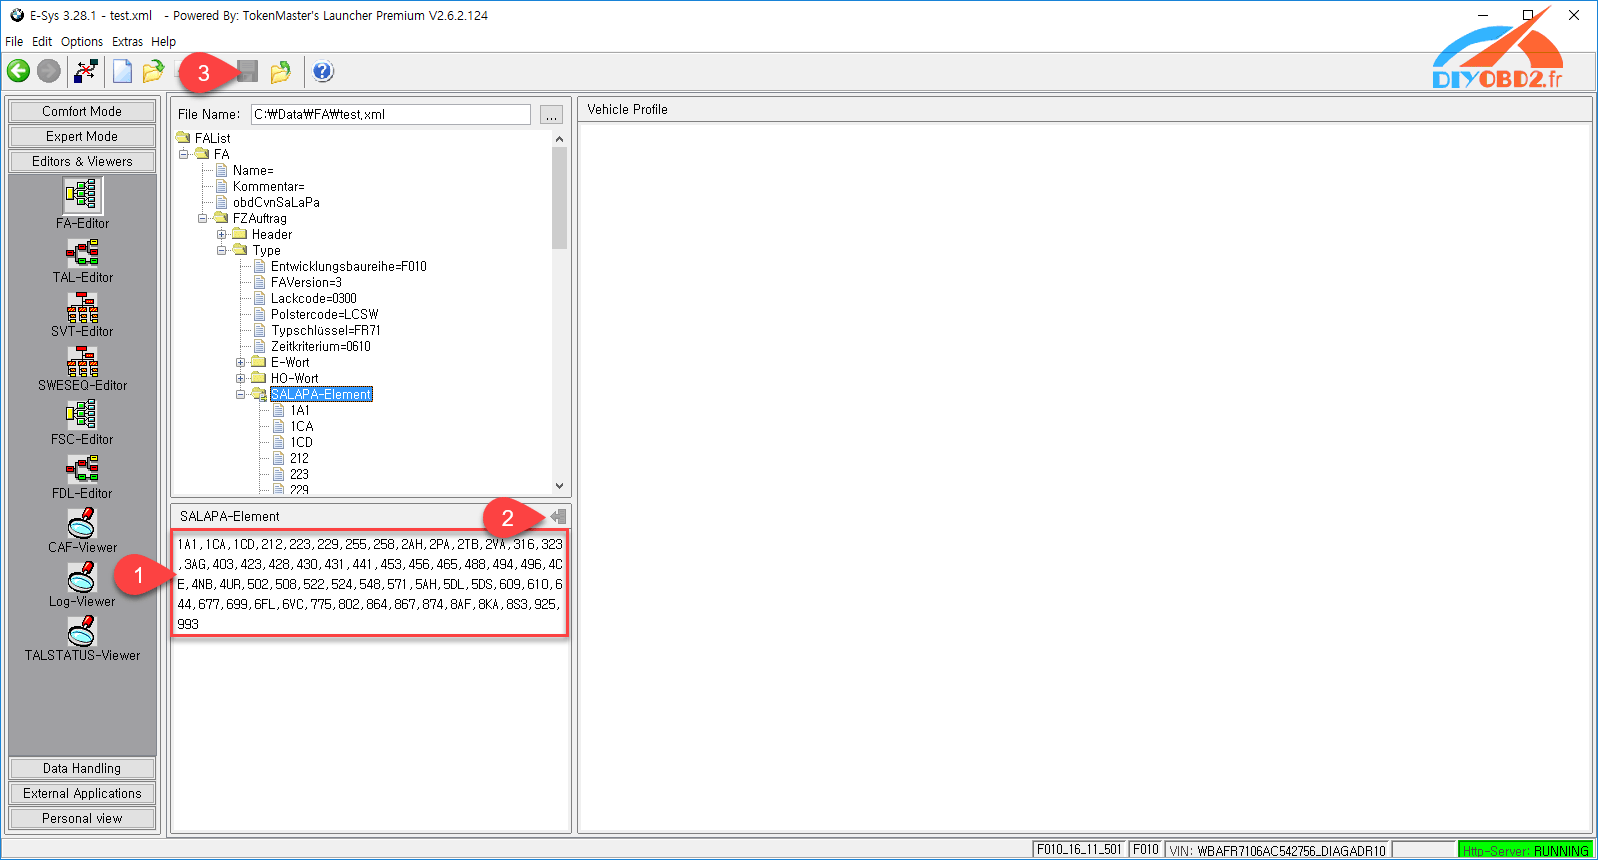
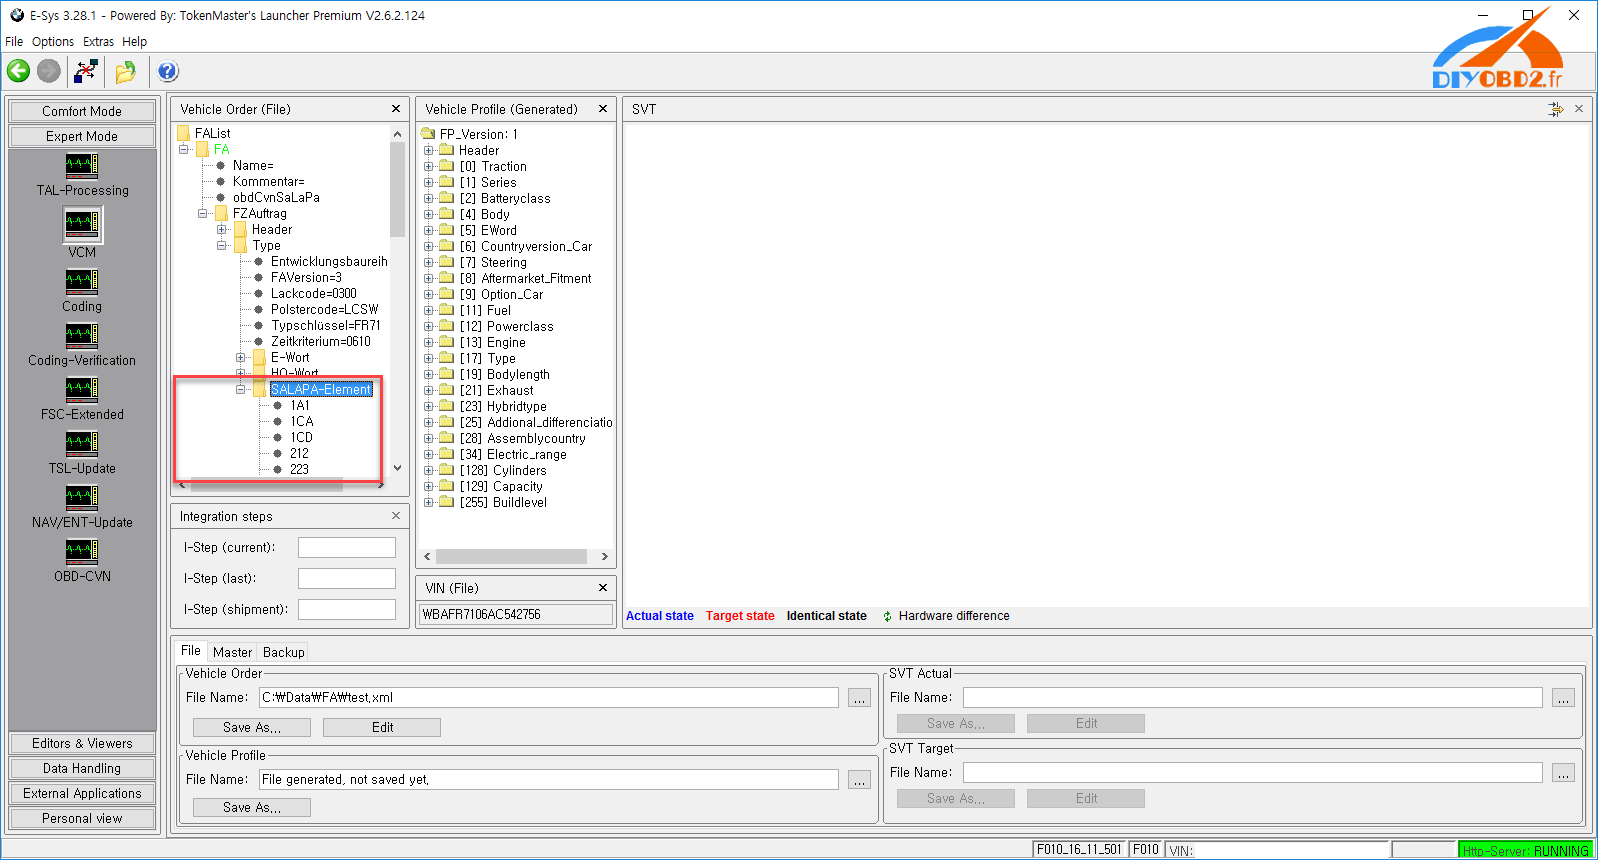
– Read and Save FA
– Activate FA
– Read and Save SVT Actual as SVT_ist
– Create an SVT Target
Under KIS/SVT Target Calculation Strategy, select Complete Flash
Select I-Step (shipm.) to match your original I-Level as read and shown in VCM I-Step (Shipment)
I-Step (target.) will be unselectable as it is fixed based on current PSdZData I-Level
Do a KIS/SVT Target Calculation and Save as SVT_soll
– Do a TAL Calculation and Save as SVT_tal
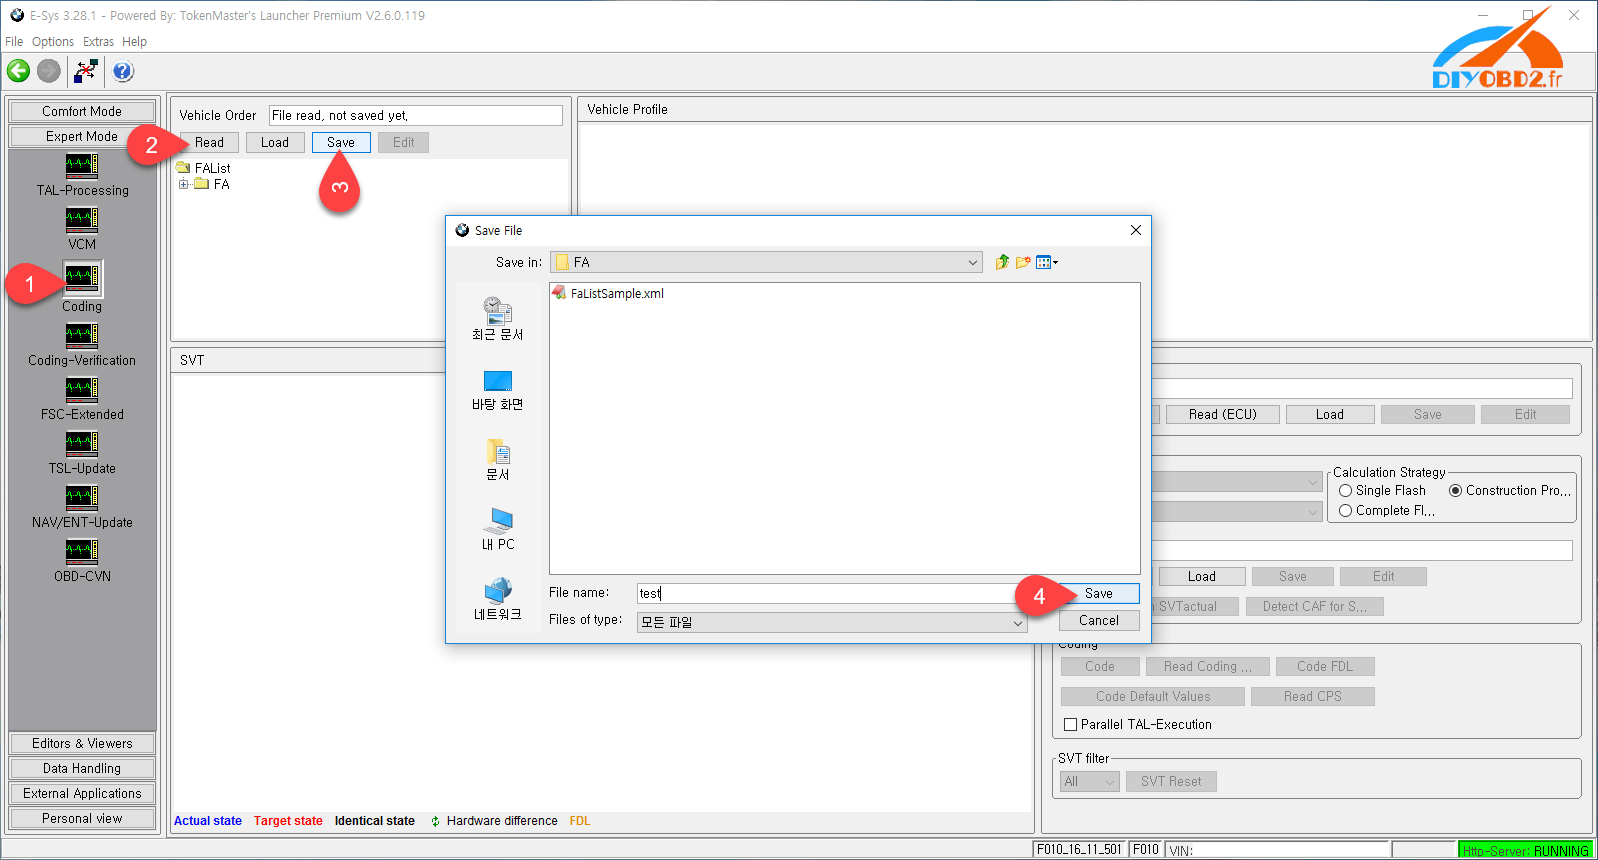
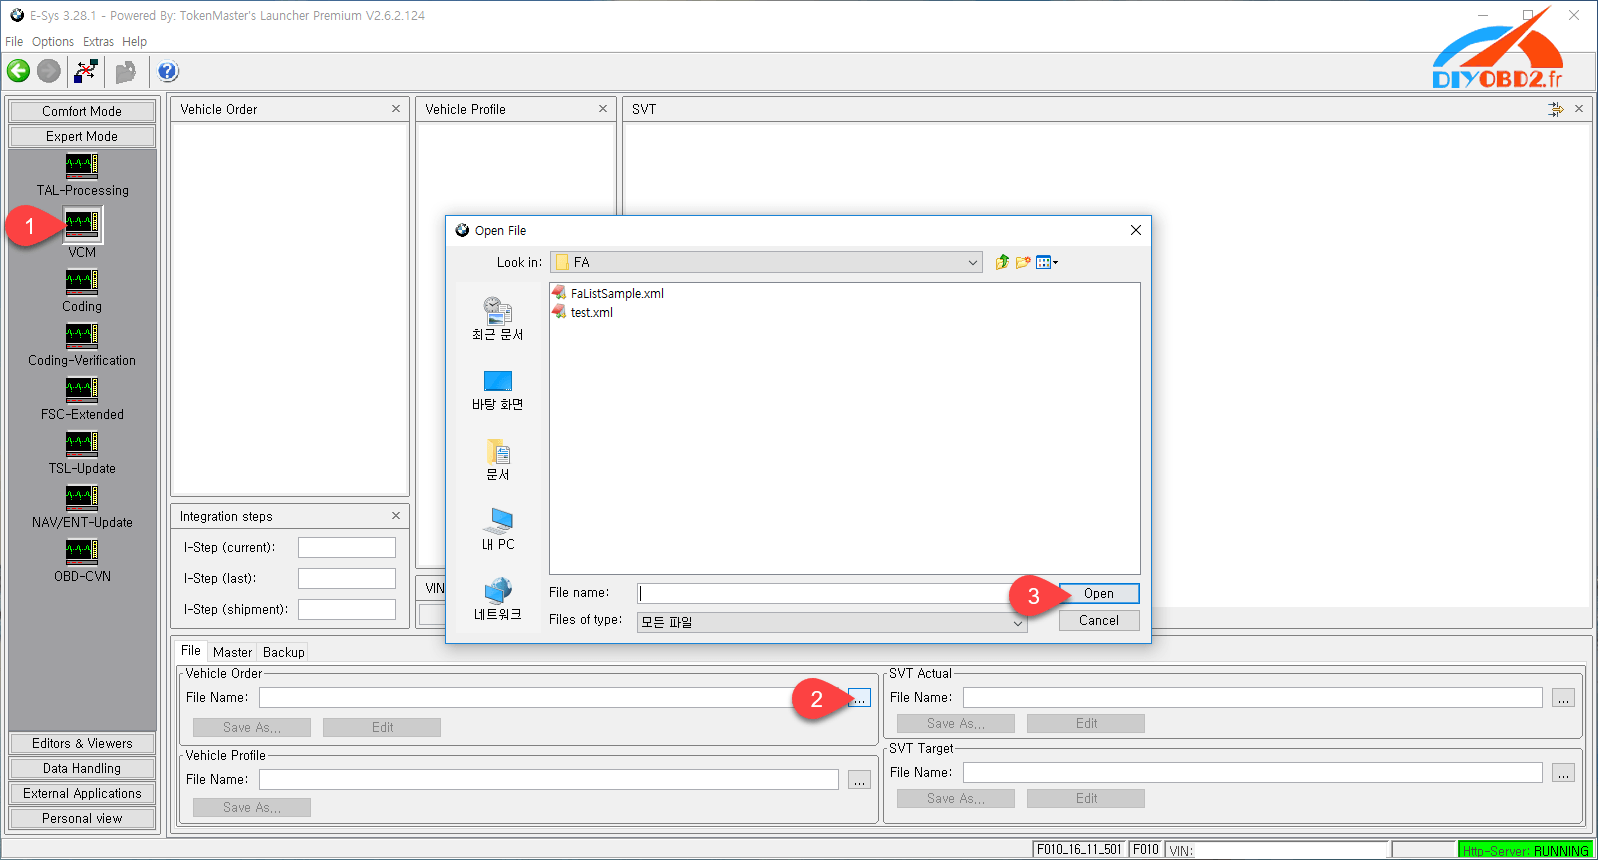
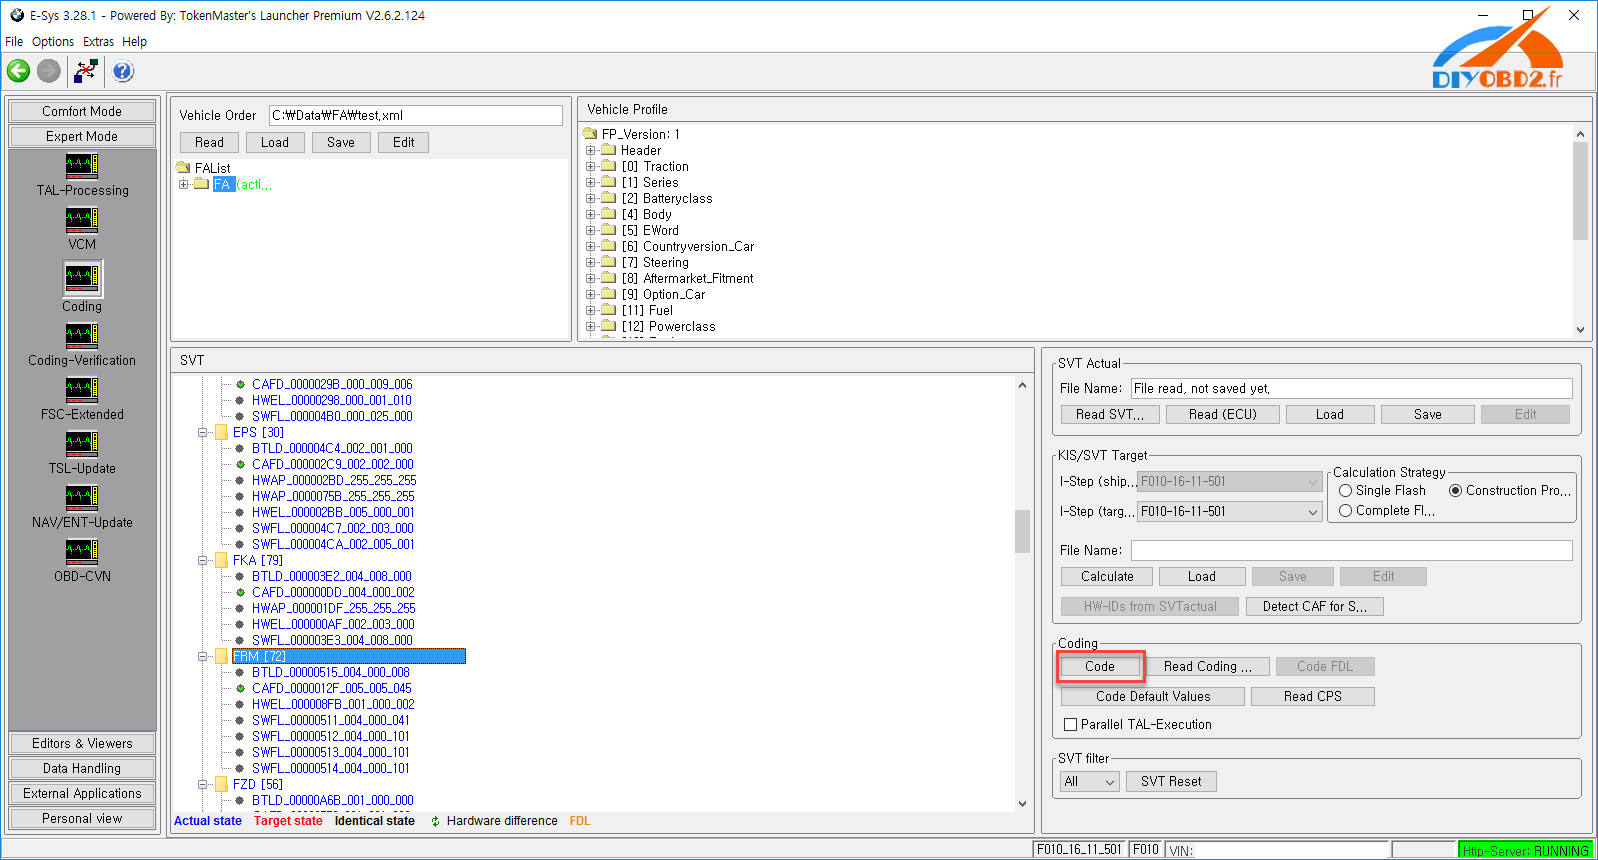
Go to Expert Mode => TAL-Processing
Load TAL (SVT_tal)
Load SVT Target (SVT_soll)
Select “Read FA” button.
Check radio button for “read VIN out of FA”
On ECU Tab, uncheck let top box in column “All” (All checked boxes should toggle to unchecked)
On ID Base Row for Kombi, make check boxes in blFlash, swDeploy, cdDeploy, and ibaDeploy columns.
Press Check software availability
Press Start and it will proceed with processing TAL to flash Kombi with new firmware.
Please go on your reading for details.
- Connect external charger (at least 50AMPs, preferably 70AMPs) to the car battery. Connect laptopto power supply. This step is essential!
- Turn lamp switch to parking light – this will keep the ignition on beyond 20 minutes.
Turn light switch to Parking Lamp On – first position/stop to the right.
Please refer to Appendix B for further info regarding the light switch and the 20
minutes.
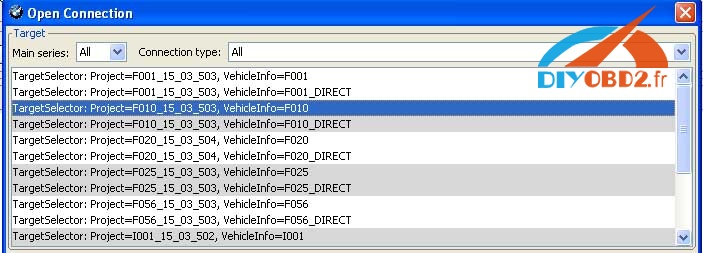
- Connect via “Connection via Gateway URL”
In the Connection window, select the ‘Connection via gateway URL’ instead of via VIN, and use the car’s IP address with the default port number 6801.
Passed with flying colors
(else flashing ZGW will fail)

- Select Comfort Mode à TAL Calculating

- Read and save FA

- Activate FA

- Read and save SVT Actual as “SVT_ist”

- Create an SVT Target:
- Select Complete Flash

- Select I-Step (shipm.) to match vehicles shipment I-Step level
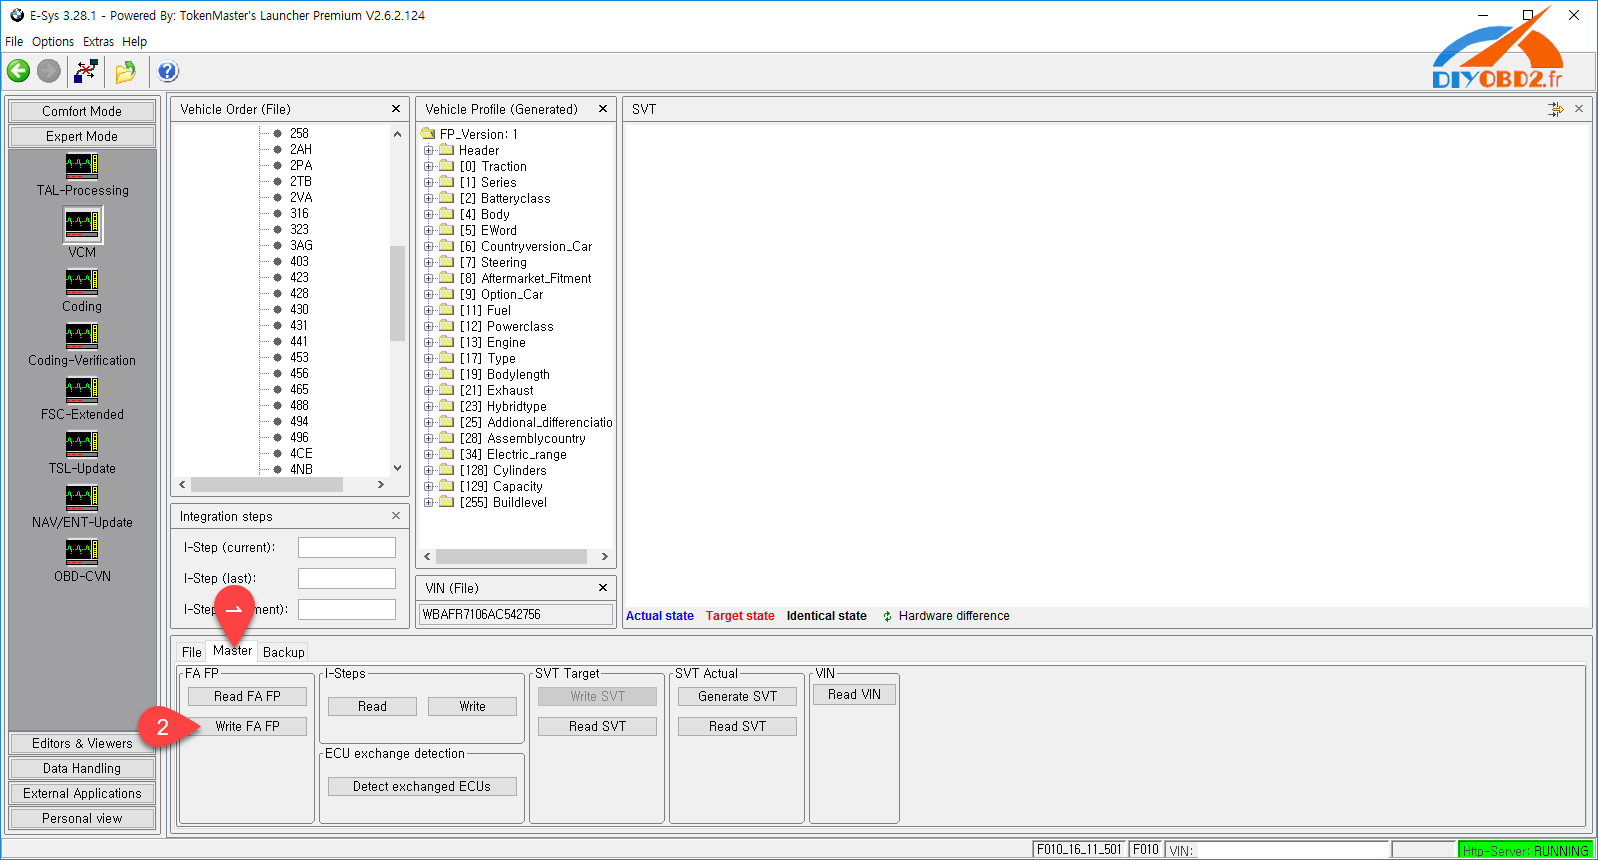
- Select Expert Mode VCM button

- On the right bottom box, select “Master” tab

iii. In I-Steps box, click on “Read” button.

- Integration Steps boxes above will be populated with the data. Note down the IStep
(Shipment).

- I-Step (target.) will be unselectable as it is fixed based on current PSdZData I-Level. Select
the appropriate level in I-Step (shipm.) as obtained in step above

- Do a KIS/SVT Target Calculation and Save as “SVT_soll”

- Do a TAL Calculation and Save as “SVT_tal”

- Go to Expert Mode à TAL-Processing

- Load TAL [SVT_tal) created in step 8.e

- Load SVT Target (“SVT_soll”) created in step 8.d

- Click the “Read FA” button

àthis will result in the FA_aus_VCM.xml file:

- Check radio button for “read VIN out of FA” and click the “Read VIN” button

- On ECU Tab, uncheck let top box in column “All” (All checked boxes should toggle to unchecked)

- On ID Base Row for HU_CIC, CMB_MEDIA, KOMBI and ZGW check the boxes in blFlash, swDeploy,
cdDeploy, and ibaDeploy (please see Appendix C) columns.

- Press Check software availability (this, among other, ensures that you have the correct PSdZdata
and the FULL version of them)

- Press Start and it will proceed with processing TAL to flash Kombi with new firmware

- Cross your fingers and watch it work
Troubleshooting
If coding ACSM, the airbag needs be locked. This can be done by using the following procedure. If one does not have ISTA/D (Rheingold), it can be done with E-Sys or Tool32:
E-Sys Transmitter:
1) Click “External Applications” in the left menu.
2) Click “External Application”
3) Double-click “Transmitter”
4) Double-click “ACSM verriegelung_schreiben”
Tool32:
1) Launch C:\EDIABAS\Bin\TOOL32.EXE
2) Hit F3
3) Load C:\EDIABAS\Ecu\ACSM4.prg
4) In the “Select Job: F01” window, select steuern_verriegelung_schreiben
5) Hit F5
6) “Results” window should show “JOB_STATUS = OKAY”
Appendix A – list of ECU’s
Thanks to shawnsheridan on bimmerfest.com for compiling this list.
AAG – Trailer Hitch Module
ACC – Active Cruise Control
ACSM – Advanced Crash and Safety Management
AHM – Trailer module
AMP – Amplifier
AMPH – HiFi Amplifier
AMP_TOPHB – Top HiFi Amplifier/System
AMP – Amplifier/System
AMP_TOPHB – Top HiFi Amplifier/System
ASA – Active steering
ASD – Active Sound
BDC – Body Domain Controller (ZGW, FEM, REM, SZL, IHKA, TCB, CAS, JBBF Combined)
CAS – Car Access System
CID – Central Information Display
CMB_ECALL – Combox Emergency Caller
CMB_MEDIA – Combox Media
CVM – Soft top module (Convertable Top)
DKOMBI – MFID Instrument cluster (6WB)
DDE – Digiatl Diesel Electronics
DME – Digital Motor Electronics
DSC – Dynamic Stability Control
DWA – Immobilizer (Alarm)
DVDC – DVD Changer
EGS – Electronic Transmission Control Unit
EHA – Electronic ride-height control
EHC – Electronic ride-height control
EKPM – Electronic fuel pump control
EMF – Electromechanical parking brake
EPS – Electronic power steering
FEM_BODY – Front electronics module (ZGW, FRM, CAS, and JBBF Combined)
FEM_GW – Front electronics module gateway
FKA – Rear-cabin automatic A/C
FLA – Automatic High Beam Camera Only
FRM – Footwell module (Lighting)
FRR – Active cruise control
FZD – Function unit roof
GWS – Gear selection switch
HKFM – Rear Lift-Lid (Trunk)
HKL – Rear Lift-Lid (Trunk)
HU_ENTRY – Head Unit Entry Level (no iDrive System)
HU_CHAMP (Head Unit CIC Mid) (iDrive system)
HU_CIC – Head Unit CIC High (iDrive system)
HU_NBT – Head Unit NBT (iDrive system)
HC2 – Lane Change Warning
HUD – Heads-Up Display
ICM_QL – Integrated Chassis Management
ICM_V – Integrated Chassis Management Vertical (Vertical dynamics management)
IHKA – Integrated automatic heating/air conditioning system
JBBF – Junction box electronics
JBE – Junction box electronics
KAFAS – Cameras System (LDW, AHB, SLI)
KOMBI – Instrument cluster
LHM – LED Headlights main light modules (fan and LEDs for the cornering light, low-beam and high-beam
headlights).
NIVI – Night Vision Camera
PDC – Park distance control
PMA2 – Parking Assist
RDC – Tyre pressure control
REM – Rear Electronics Module
RSE – Rear Seat Entertainment
SM – Seat module / Seat Memory
SME – Accumulator-management electronics
SMBF – Seat module / Seat Memory Passenger
SZL_LWS – Steering column control unit
SVT – Servotronic
TCB – Telematics Communications Box (BMW Assist)
TMS – LED Headlights (stepper motors for the Adaptive LED Headlights and LEDs for the side marker light,
the positioning light and the turn indicator)
TRSVC -All around view camera
TBX – iDrive Controller Touch Handwriting Module
VDM – Vertical dynamics Management
ZBE – iDrive Controller
ZGW – Central gateway module
Appendix B
On new cars (7/2014 F30) the ignition will not stay on even if you turn light switch. After 15 minutes or so
ignition will turn off. This is not a problem though, just remember to cycle ignition before svt soll
calculation and before starting TAL processing (actual flash). Ignition will stay on as long as the TAL is
running.
Thank you ap90500
Appendix C
ibadeploy is needed only if you are flashing a headunit that has IBA (electronic user manual). It doesn’t do
any damage if it is selected without a reason though.
Thank you ap90500
Again, BIG THANKS to all contributors here!!!!!!!!!!
Edit by http://www.chinacardiags.com/